Get full C++ & Python code + lifetime access
The ESP32 Project Setup guide introduces the foundational steps for working with one of the most popular Wi-Fi and Bluetooth-enabled microcontrollers.
In this project, you will connect the ESP32 to your laptop, configure the development environment, modify the underlying code to suit your application, and flash the new firmware onto the board.
This guide introduces:
By completing this process, you will understand how to establish communication between your laptop and the ESP32, modify project code, and successfully deploy firmware onto embedded systems.
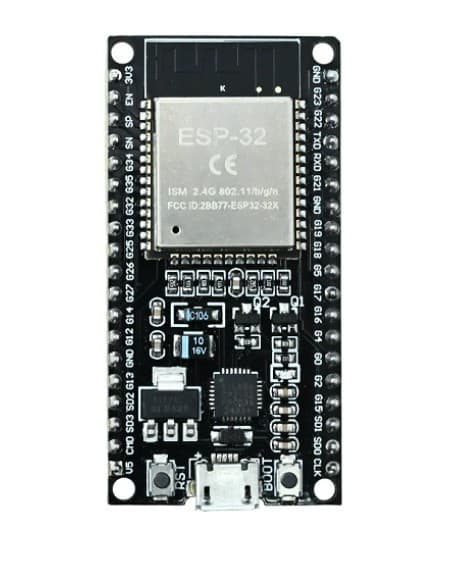
ESP32 Development Board × 1
Laptop / PC × 1
Data-Capable Micro-USB or USB-C Cable × 1
Arduino IDE or VS Code (with ESP32 Support) × 1
USB-to-UART Drivers (CP210x / CH340) × 1
Connect the ESP32 board to your laptop using a data-capable USB cable.
Ensure the power LED on the ESP32 board lights up to confirm power delivery.
Install the required USB-to-UART drivers (CP210x or CH340) if your operating system does not automatically recognize the device.
In your IDE:
Open the board configuration panel in your IDE to ensure the correct serial port and upload speed (115200 baud) are selected.
Important: Ensure you are using a USB Data Cable and not a power-only charging cable. A power-only cable will power the ESP32 board but will fail to register a COM port on your laptop.
The USB-to-UART converter chip on the ESP32 enables serial communication over USB, allowing your laptop to flash code and read log outputs.
Open your project code and locate configurable variables:
SSID and PASSWORD.Click Verify to compile the code and ensure there are no syntax errors.
Click Upload to convert the code into binary files and transfer them to the ESP32's flash memory.
Open the Serial Monitor set to 115200 baud to view boot logs, network connection status, and runtime debugging messages.
After uploading the code:
Port Not Detected: Check your USB cable to ensure it supports data transfer, or manually install the CP210x / CH340 USB drivers.
Failed to Connect Error: If the upload gets stuck at "Connecting...", press and hold the physical BOOT button on the ESP32 until the upload process begins writing to memory.
Garbage Characters in Serial Monitor: Verify that the Serial Monitor baud rate is set to 115200 (or the rate defined in your Serial.begin() statement).
Upload Errors: Re-check that the correct board model and COM port are active under the IDE tools menu.
By completing this project setup, you have learned:
In the next section, you will build a Wi-Fi Web Server using the ESP32 to control GPIO pins remotely over a local network.